
Preparing a Print File
Adobe In-Design has become a very popular piece of software used by print-professionals & designers plus many business owners. However, unless you have a very good understanding of the print process with an equally solid knowledge of spot and process colour (CMYK) workings, then it can be difficult to know exactly how to supply your finished artwork to the company who will be printing it.
The following is hopefully, an easy-to-follow guide walking you through the preparation process.
What is Adobe In-Design?
ID (Adobe In-Design) is basically a page layout program that allows you to accurately place elements that may have been produced in other programs, as well as ID itself. For instance, you may have created some imagery in Adobe Photoshop, possibly created a logo in Adobe Illustrator and now wish to bring all the elements together to complete your artwork.
Other Software
Please note: you are not limited to Adobe software. Files can be imported from other 3rd party software such as Paint Shop Pro, Corel, etc., in fact anything that uses industry-standard file formats, e.g. tiff, jpeg, eps etc.
I’m assuming the reader will already know how to put together artwork, but is looking to learn about preparing this in InDesign for sending to a printer.
For the purposes of this exercise we’ll assume you are preparing artwork for printing in CMYK format, not Spot Colours. (see explanation).
Time needed: 20 minutes.
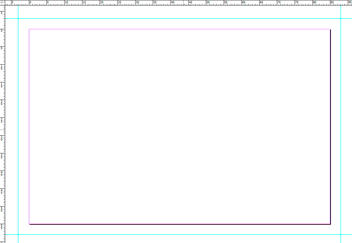
- Set up your workspace
Ok, we’ll get a business card into a print-ready state by firstly setting our workspace to 85mm x 55mm as below. You’ll notice I’ve already placed guides outside the workspace at 3mm intervals as our artwork will be using ‘bleeds‘.
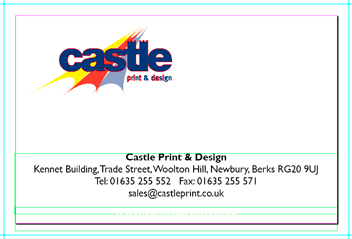
- Add the various elements
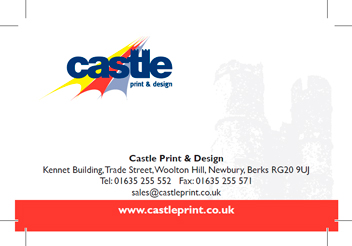
I’ve now placed the logo and some text . . .
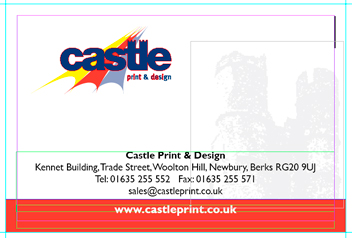
. . . followed by the rest of my artwork. - Position Bleeds
As you can see, the ghost image of the castle and the red slug both ‘bleed‘ off the artwork.
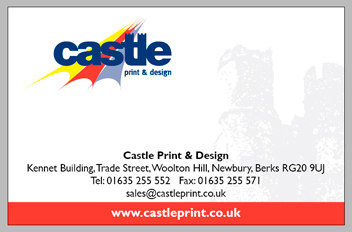
- Preview
Now press ‘W’ (PC or Mac) to see a preview of your finished job. This looks ok so we’re now ready to make a print-ready pdf, (with crop marks), to send to your printer.
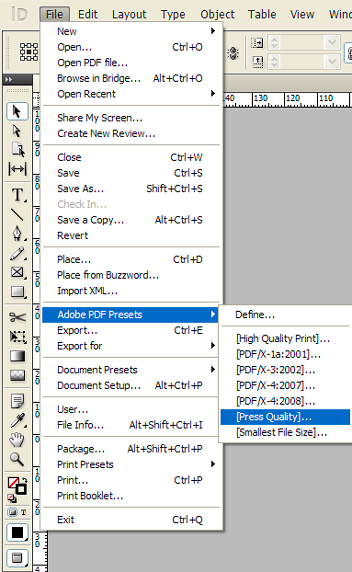
- Ensure Press Quality
Now go to File > Adobe PDF Presets > [Press Quality] as shown below.
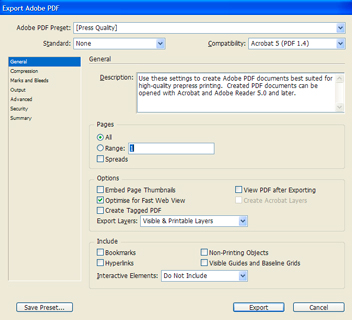
- PDF Settings
This will now open up the window shown below.
- Crop Marks & Bleeds
Navigate to Marks and Bleeds then select Crop Marks and change Bleed to 3mm, as below.
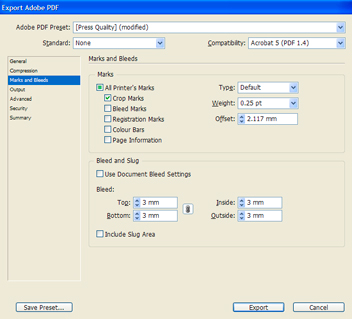
There are many other options scattered around the menus however I would say that 9 times out 10 the above will give you a workable file that your printer can use. - Check the output
Now to check the pdf we’ve just generated:
As you can see, the pdf is correct with the artwork pulled out by 3mm where necessary and the all-important crop marks in place.
As you learn more about the workings of In-Design you’ll notice that there are some powerful tools built-in to help you get your artwork into print without any costly mistakes.
Preflighting
With your document still open, if you look to the bottom left of your workspace you’ll notice the ‘Preflight’ option. If you click on ‘Define Profiles’ you can set up your own preflighting options.
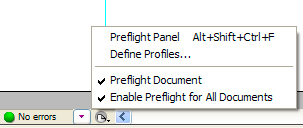
For instance, you can have the program alert you to spot colours being present when outputting a 4 colour job, or missing fonts, or a host of issues that could spoil your day if the file was to go to print.
I have to check many artwork files on a daily basis and would say that the most frequent problems I come across are:
- CMYK artwork sent to us when the client has requested a spot colour job.
- Spot colours mixed with CMYK colours.
- Missing crop marks / bleeds.
- Low resolution (72dpi) web graphics sent in for high quality output.
The above seem to be some of the most common problems and flightchecking your document will help to overcome most of them.
Common business card design problems
Low-Res/High-Res graphics
Many people are confused as to why something may look great onscreen but won’t print without the dreaded ‘jaggies’.
Basically, a standard computer monitor has a resolution of 72dpi. (Some monitors are higher resolution these days however 72dpi will suffice for our purposes), Websites are designed at 72dpi for this reason.
For lithographic print we need 300dpi, so it follows that web graphics or any low-res file will give poor results when output on a hi-res device such as an imagesetter.
If the only image you have is on your website, then it will probably need redrawing at a higher resolution.
Hi-res Logo
Most designers are switched on to the fact that you may need your logo for printing at some stage, so if you’ve had a logo designed for you, check with your designer to see if they have a hi-res file available for you. They usually do.
If your logo is 72dpi don’t fall into the trap of boosting the resolution from 72 to 300dpi in a paint program such as Photoshop, Paint Shop Pro etc. as this won’t work. ‘Upping’ the resolution in this way just interpolates the image, i.e. adds similar coloured pixels to the image, which in turn can ‘up’ the image size but makes for a more ‘blurry/fuzzy’ effect and certainly not suitable for general print.
Extra Info
If using a non-standard business card size, e.g. 90mm x 50mm then please point this out when sending in the print file. If you leave the card outline showing, which is easily removed by one of our artworkers at the card planning stage, then this will help us determine exactly the card size and positioning of the artwork you are using.
If you are sending in a pdf, and not sure how to convert all text (fonts) into outlines (Converting Text to Outlines) then please include the font details in your email and whether the design was done on a PC or Mac. Most printers use both systems but often the fonts, although sharing the same name, can be slightly different, especially with issues such as letter spacing (kerning).
Spot colours or process
If you are not sure if you should be using spot colours in your artwork, or CMYK (process colours), then check out this info:
Spot & Process Colours Explained
Colours & Monitors
A monitor is a backlit device so consequently colours look very vibrant onscreen especially with many of the newer flat screen varieties.
This has to be taken into consideration when designing logos, or graphics of any kind that will need to be printed.
Using a flat ink will never compete with what you see onscreen.
A standard monitor uses Red, Green & Blue (RGB) to define its colour output whereas with the printing process, and I’m referring to a standard lithographic one not digital, uses either a Pantone® colour matching system, or CMYK (Cyan, Magenta, Yellow & Black) process.
Do not expect to see the colour viewable on your monitor exactly reproduced in your print job. Unless you have a professional colour calibrated monitor, the colours you see onscreen will not be accurate.
For instance, a bright orange (Pantone® 021) looks great onscreen, but when trying to produce this in a 4 colour process (CMYK) will look a little on the brown side and certainly nothing like you see onscreen. Using a spot colour, e.g. Pantone® 021 overcomes this but sometimes this is not possible due to costs.
If your software supports it, make sure you are working in CMYK and not RGB.
If there’s something that needs explaining in the above article, or you have any tips / shortcuts of your own, please leave a message below.


Leave a Reply