
How to create an iRiver design
Step 1:
Let’s start out by creating a new file. I used a 850×300 pixels canvas set at 72dpi, and I filled my background with white. In a new layer draw a large grey rounded rectangle with a short cuve, #B9BABF color shade and 300 x 185 px dimensions. Then cut the right side corners off the rounded rectangle.

Step 2:
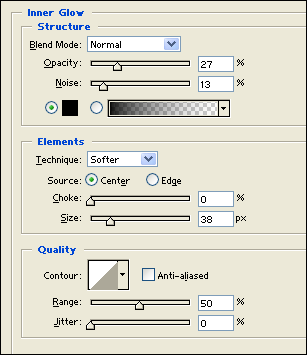
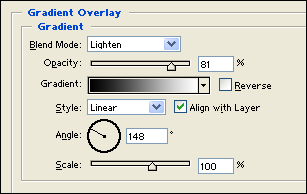
Under Layer Style(Layer > Layer Style) add an Inner Glow and Gradient Overlay blending options to your grey rounded rectangle layer.
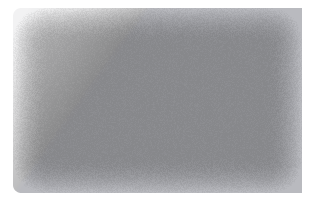
Result:
Step 3:
In a new layer draw a grey vertical rectangle with #C3C6CB color shade and 56 x 185 px dimensions.

Step 4:
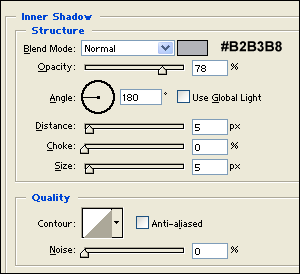
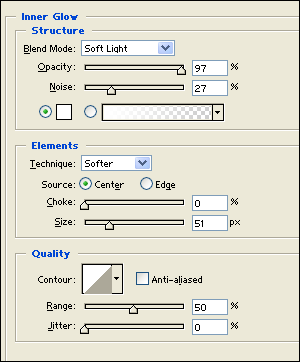
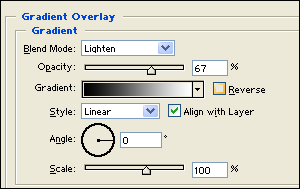
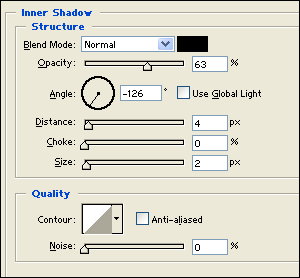
Under Layer Style(Layer > Layer Style) add an Inner Shadow, Inner Glow and Gradient Overlay blending options to the grey vertical rectangle layer.
Result:

Step 5:
In a new layer draw a black vertical rectangle with the same size as your grey vertical rectangle.

Step 6:
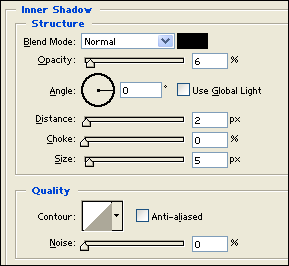
Under Layer Style(Layer > Layer Style) add an Inner Shadow and Gradient Overlay blending options to the black vertical rectangle layer. Then set the layer’s blending mode to Lighten.
Result:

Step 7:
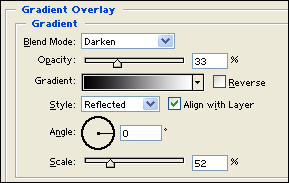
In a new layer draw a large dark grey rounded rectangle with #3D4047 colour shade and 275 x 159 px dimensions.
Step 8:
Under Layer Style(Layer > Layer Style) add an Inner Glow, Gradient Overlay and Stroke blending options to the dark grey rounded rectangle layer.
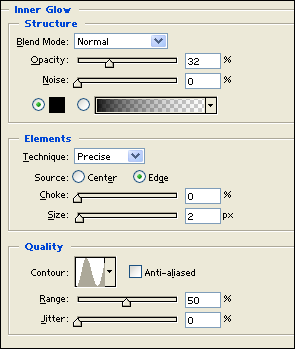
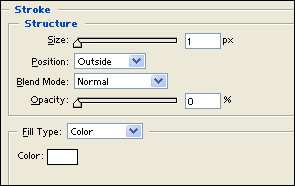
Result:
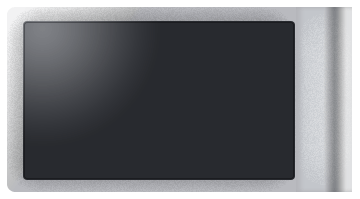
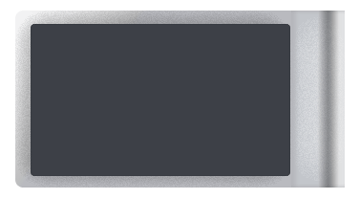
Step 9:
In a new layer draw a white rectangle with 39 x 69 px dimensions on the top right corner of the design.

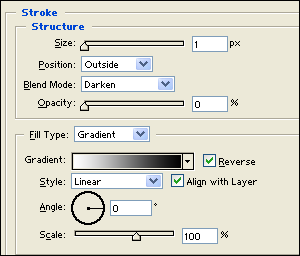
Step 10:
Under Layer Style(Layer > Layer Style) add an Inner Shadow, Satin, Gradient Overlay and Stroke blending options to your white rectangle layer.
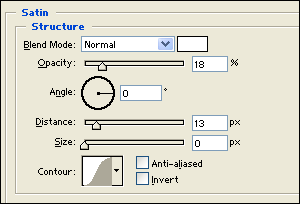

Result:
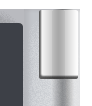
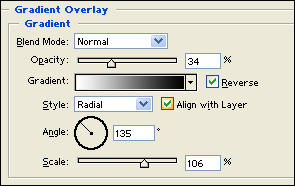
Step 11:
In a new layer draw a small white rectangle with 38 x 5 px dimensions as shown below.
![]()
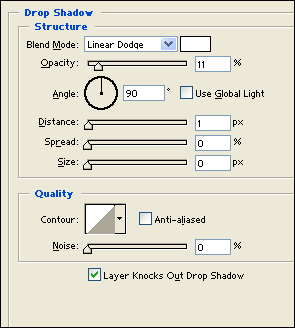
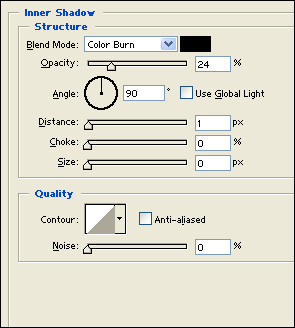
Step 12:
Under Layer Style(Layer > Layer Style) add a Drop Shadow, Inner Shadow and Gradient Overlay blending options to your small white rectangle layer.

Result:
![]()
Final Results:
How to create an iRiver design


Leave a Reply