
How to design an Alien Head Logo
Step 1:
Let’s start out by creating a new file. I used a 300×300 pixels canvas set at 72dpi, and I filled my background with a white color. Now create a new layer set and name it ‘Alien Head Logo Design’.
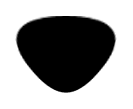
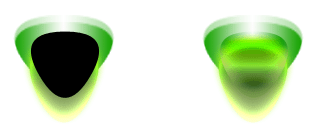
Now select the Polygon Tool, above your screen under the options palette choose Fill Pixels, set the sides to 3 with anti-aliased checked. Then access the Polygon Options palette and check Smooth corners. In a new layer draw a black polygon with 102×77 px dimensions.
Step 2:
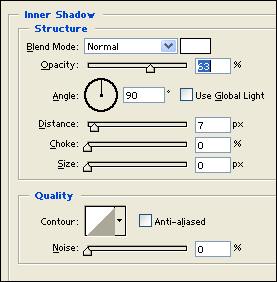
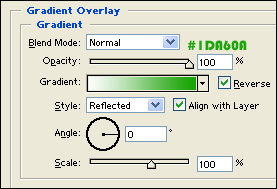
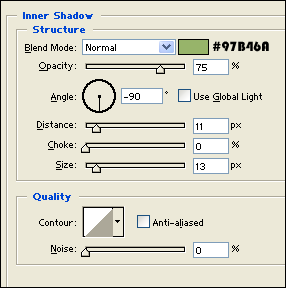
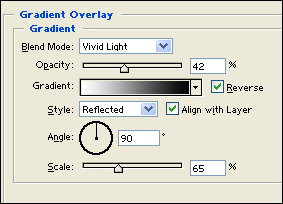
Under Layer Style(Layer > Layer Style) add an Inner Shadow and Gradient Overlay blending options to your black polygon layer.

Step 3:
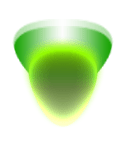
Now create a new layer and draw a dark green polygon with #4B7F00 colour shade and 70×77 px dimensions.

Step 4:
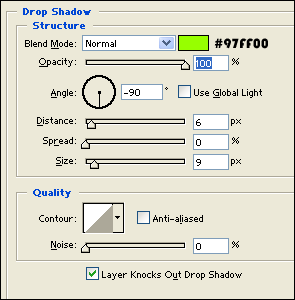
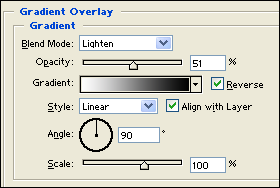
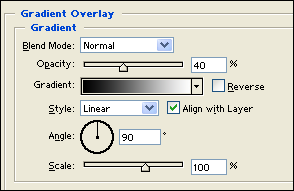
Under Layer Style(Layer > Layer Style) add a Drop Shadow, Inner Glow and Gradient Overlay blending options to your dark green polygon layer.

Step 5:
In a new layer draw another black polygon shape on the center of the current design. Now under Layer Style(Layer > Layer Style) add an Inner Shadow and Gradient Overlay blending options. Then set the layers blending mode to Lighten.
Step 6:
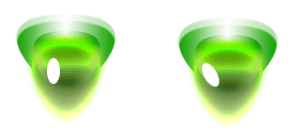
Now add the eyes, first create a new layer and draw a white ellipse with 13 x 26 px dimensions. Then rotate it through Edit > Transform > Rotate.
Step 7:
Under Layer Style(Layer > Layer Style) add an Inner Glow blending option to your white ellipse layer.

Step 8:
Duplicate the first eye design and flip it horizontal then position on the other end of the alien head.
Step 9:
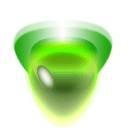
Create a new layer and draw a small black circle on the center of the alien head. Set the layer’s blending mode to Soft Light at 38%.

Step 10:
In a new layer add a small black circle inside the eye design. Then under Layer Style(Layer > Layer Style) add a Gradient Overlay blending option to your black circle layer.

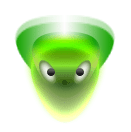
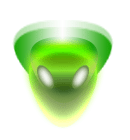
Results:
How to Design an Alien Head Logo


Leave a Reply